
The purpose of this blog post is to provide multiple methods on how to install/setup Hashicorp Boundary. This blog post generated an Ansible playbook, Docker-compose for Swarm, and manual instructions for installing Boundary on Ubuntu 20.04. In addition, this blog post will demonstrate how to setup Auth0 OIDC authentication for single-sing on. Lastly, I will end this blog post with connecting to a remote machine in my homelab via SSH using the Boundary Desktop and CLI client.
Goals
- Setup Auth0 OIDC authentication
- Install/Setup Boundary single-node controller and worker with Ansible
- Install/Setup Boundary single-node controller and worker with Docker
- Install/Setup Boundary single-node controller and worker with manual instructions
- Access homelab servers remotely using Boundary
- Setup Boundary Desktop on macOS
- Generate certificates with Vault for trusted communication between Boundary clients and server
DISCLAIMER
This blog post is a proof of concept (POC) for a homelab and does NOT implement best practices for an enterprise environment. Please review the Hashicorp Boundary documentation for best practices. In addition, this POC will be setting up a single Boundary controller and worker instance which does not provide high-availability.
DISCLAIMER
Background
What is Boundary?
What is Auth OIDC?
OpenID Connect (OIDC) is an identity layer built on top of the OAuth 2.0 framework. It allows third-party applications to verify the identity of the end-user and to obtain basic user profile information. OIDC uses JSON web tokens (JWTs), which you can obtain using flows conforming to the OAuth 2.0 specifications. While OAuth 2.0 is about resource access and sharing, OIDC is about user authentication. Its purpose is to give you one login for multiple sites.
Each time you need to log in to a website using OIDC, you are redirected to your OpenID site where you log in, and then taken back to the website. For example, if you chose to sign in to Auth0 using your Google account then you used OIDC. Once you successfully authenticate with Google and authorize Auth0 to access your information, Google sends information back to Auth0 about the user and the authentication performed. This information is returned in a JWT.
Boundary keys
- Root key – Only the Boundary controller uses this key. This key is used to encrypt the data stored in the Postgres database
- Recovery key – This is a last resort key incase the admin password is forgotten/lost. This key can be used as an authentication key to login and manage the cluster.
- Worker key – The key used for authentication between the Boundary workers and the controllers
Boundary/Vault config resources
- Boundary listener config documentation
- Boundary worker config documentation
- Boundary controller config documentation
- Boundary + Vault Transit config documentation
- Boundary OIDC Authentication
- Vault Encryption as a Service: Transit Secrets Engine
Assumptions
- The means to generate DNS A records for each service.
- Pre-existing Vault infrastructure
- If not please see my blog post here: Getting started with Hashicorp Vault v1.6.1
- Vault root CA has been distributed to all devices as a trusted certificate
- Auth0 account and your an administrator
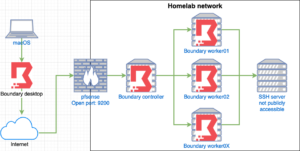
Network diagram
Setup Auth0 OIDC
- Log into a Auth0 account as an administrator
- Applications > Applications
- Select “+ Create Application” in the top right
- Enter a name for application
- Select “Regular web applications” for application type
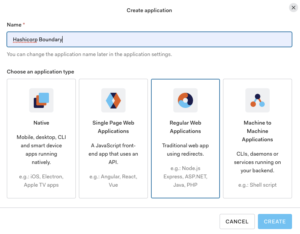
- Select “Create”
- Select “Go” for technology
- Select “Settings” tab
- Keep this browser tab open because we will need
Setup Vault and generate certificates for Boundary
Create Boundary intermediate
git clone https://github.com/CptOfEvilMinions/BlogProjectscd BlogProjects/HashicorpBoundary- Login into Vault
BASE_DOMAIN=<domain>vault secrets enable -path=boundary_pki_int pki- Enable the pki secrets engine at the
boundary_pki_intpath
- Enable the pki secrets engine at the
-
vault secrets tune -max-lease-ttl=43800h boundary_pki_int
- Tune the
boundary_pki_intsecrets engine to issue certificates with a maximum time-to-live (TTL) of 43800 hours - 43800 hours = 5 years
- Tune the
-
vault write -format=json boundary_pki_int/intermediate/generate/internal common_name="boundary.${BASE_DOMAIN} Intermediate Authority" | jq -r '.data.csr' > conf/tls/boundary_$(tr . _ <<< ${BASE_DOMAIN})_pki_int.csr- Generate an intermediate certificate and save the certificate signing request (CSR) to disk
vault write -format=json pki/root/sign-intermediate csr=@conf/tls/boundary_$(tr . _ <<< ${BASE_DOMAIN})_pki_int.csr format=pem_bundle ttl="43800h" | jq -r '.data.certificate' > conf/tls/boundary_$(tr . _ <<< ${BASE_DOMAIN})_pki_int.crt- Sign the intermediate certificate with the root certificate and write the generated certificate to disk
vault write boundary_pki_int/intermediate/set-signed certificate=@conf/tls/boundary_$(tr . _ <<< ${BASE_DOMAIN})_pki_int.crt- Upload the signed certificate
-
vault write boundary_pki_int/roles/$(tr . _ <<< ${BASE_DOMAIN}) allowed_domains="boundary.${BASE_DOMAIN}" allow_subdomains=true allow_bare_domains=true max_ttl="8760h"- Create a role that allows certificates for subdomains to be generated
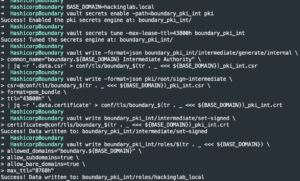
- Create a role that allows certificates for subdomains to be generated
rm conf/tls/boundary_$(tr . _ <<< ${BASE_DOMAIN})_pki_int.csr
Create Boundary controller leaf certificate
vault write -format=json boundary_pki_int/issue/$(tr . _ <<< ${BASE_DOMAIN}) common_name="controller01.boundary.${BASE_DOMAIN}" alt_names="boundary.${BASE_DOMAIN}" ttl="8760h" > conf/tls/controller01_boundary_$(tr . _ <<< ${BASE_DOMAIN}).json- Request a new certificate for Boundary
- Common name:
controller01.boundary.hackinglab.local - Additional SAN:
boundary.hackinglab.local - 8760 hours 122 = 1 year
cat conf/tls/controller01_boundary_$(tr . _ <<< ${BASE_DOMAIN}).json | jq -r '.data.private_key' > conf/tls/controller01_boundary_$(tr . _ <<< ${BASE_DOMAIN}).key- Extract private key from JSON blob
-
cat conf/tls/controller01_boundary_$(tr . _ <<< ${BASE_DOMAIN}).json | jq -r '.data.certificate' > conf/tls/controller01_boundary_$(tr . _ <<< ${BASE_DOMAIN}).crt -
cat conf/tls/controller01_boundary_$(tr . _ <<< ${BASE_DOMAIN}).json | jq -r '.data.ca_chain[]' >> conf/tls/controller01_boundary_$(tr . _ <<< ${BASE_DOMAIN}).crt- Extract public certificate chain from JSON blob
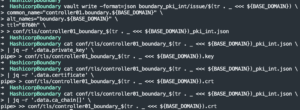
- Extract public certificate chain from JSON blob
-
rm conf/tls/controller01_boundary_$(tr . _ <<< ${BASE_DOMAIN}).json
Create Boundary worker leaf certificate
vault write -format=json boundary_pki_int/issue/$(tr . _ <<< ${BASE_DOMAIN}) common_name="worker01.boundary.${BASE_DOMAIN}" ttl="8760h" > conf/tls/worker01_boundary_$(tr . _ <<< ${BASE_DOMAIN}).json- Request a new certificate for Boundary with common name:
worker01.boundary.hackinglab.local - 8760 hours 122 = 1 year
- Request a new certificate for Boundary with common name:
cat conf/tls/worker01_boundary_$(tr . _ <<< ${BASE_DOMAIN}).json | jq -r '.data.private_key' > conf/tls/worker01_boundary_$(tr . _ <<< ${BASE_DOMAIN}).key- Extract private key from JSON blob
-
cat conf/tls/worker01_boundary_$(tr . _ <<< ${BASE_DOMAIN}).json | jq -r '.data.certificate' > conf/tls/worker01_boundary_$(tr . _ <<< ${BASE_DOMAIN}).crt -
cat conf/tls/worker01_boundary_$(tr . _ <<< ${BASE_DOMAIN}).json | jq -r '.data.ca_chain[]' >> conf/tls/worker01_boundary_$(tr . _ <<< ${BASE_DOMAIN}).crt- Extract public certificate chain from JSON blob

- Extract public certificate chain from JSON blob
-
rm conf/tls/worker01_boundary_$(tr . _ <<< ${BASE_DOMAIN}).json
Setup Vault Transit
- Log into Vault as an administrator
vault secrets enable transit- Enable Transit secrets engine
for i in {root,recovery,worker}; do vault write -f transit/keys/boundary-$i-key; done- Create Boundary named encryption keys
for i in {root,recovery,worker}; do cat conf/vault/boundary-$i-key-policy.hcl | vault policy write boundary-$i-key -; done- Write the Boundary policies to Vault for each key
for i in {root,recovery,worker}; do echo -n "boundary-$i-token - "; vault token create -policy=boundary-$i-key --format=json | jq .auth.client_token; done- Generate Vault tokens for each Boundary key type
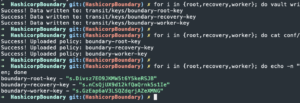
- Generate Vault tokens for each Boundary key type
Install/Setup Boundary with Docker-compose v3.x (Swarm)
WARNING
The Docker-compose v3.x setup is for development use ONLY. The setup contains hard-coded credentials in configs and environment variables. For a more secure deployment please skip to the next section to use Ansible.
WARNING
Create secrets
for i in {root,recovery,worker}; do echo -n "boundary-$i-token - "; token=$(vault token create -policy=boundary-$i-key --format=json | jq .auth.client_token); echo $token; echo $token | tr -d '"' | docker secret create vault-kms-$i-token -; done- Generate Vault tokens and store them into Docker secrets
openssl rand -base64 32 | tr -cd '[:alnum:]' | docker secret create boundary-postgres-password -- Generate a random secure password for Postgres database
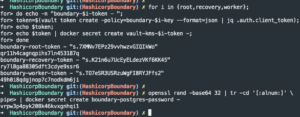
- Generate a random secure password for Postgres database
Configure docker-compose
vim docker-compose-swarm.ymland set:- controller
VAULT_ADDR– Set this value to the URL location of VaultVAULT_MOUNT_PATH– Set this value to the mount path of the Vault transit keys – defaulttransit/BASE_DOMAIN– Set the domain of the networkPOSTGRES_DB– Set the Postgres database name – default boundaryPOSTGRES_USER– Set the Postgres username – default boundary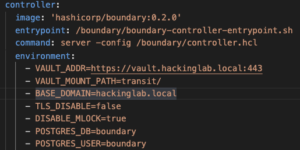
- postres
POSTGRES_DB– Set the Postgres database name – default boundaryPOSTGRES_USER– Set the Postgres username – default boundary
- worker
VAULT_ADDR– Set this value to the URL location of VaultVAULT_MOUNT_PATH– Set this value to the mount path of the Vault transit keys – defaulttransit/BASE_DOMAIN– Set the domain of the network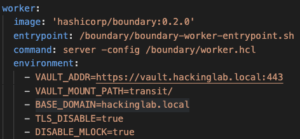
- controller
- Save and exit
Docker start stack
cat conf/tls/boundary_<domain>_pki_int.crt | docker secret create boundary-pki-int -cat conf/tls/controller01_boundary_<domain>.crt | docker secret create boundary-controller-crt -cat conf/tls/controller01_boundary_<domain>.key | docker secret create boundary-controller-key -- Create Docker secrets containing the public certs and private keys generated above
docker stack deploy -c docker-compose-swarm.yml boundary
docker service logs -f boundary_postgres- Wait until Postgres prints “database system is ready to accept connections”

- Wait until Postgres prints “database system is ready to accept connections”
docker service logs -f boundary_controller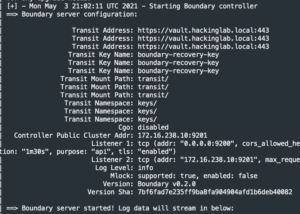
docker service logs -f boundary_worker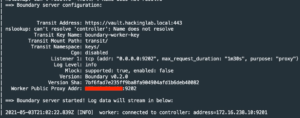
Install/Setup Boundary v0.2.0 with Ansible
Setup playbook
vim all.ymland set:base_domain– Set the domain of the networktimezone– Set the machine hosting Boundary to a timezone – default UTC +0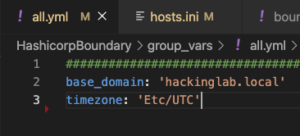
cp group_vars/boundary.yml.example group_vars/boundary.ymlvim group_vars/boundary.ymland set:hostname– Set the hostname of the server hosting the Boundary controller and worker – default boundaryboundary_version– Set the version of Boundary to use – this playbook has been tested to work with Boundary v0.2.0postgres_password– The password for the Postgres database for BoundaryVAULT_ADDR– Set this value to the URL location of VaultVAULT_MOUNT_PATH– Set this value to the mount path of the Vault transit keys – defaulttransit/vault_kms_root_token– Set to the Vault token generated above for rootvault_kms_worker_token– Set to the Vault token generated above for the workervault_kms_recovery_token– Set to the Vault token generated above for recovery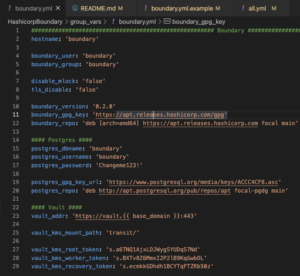
vim hosts.iniand add the IP address of the Boundary server under[boundry_single_node]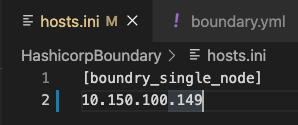
Run playbook
ansible-playbook -i hosts.ini deploy_boundary_single_node.yml -u <user> -K- Enter password
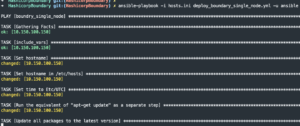
- Enter password
Manual install/setup of Boundary v0.2.0 on Ubuntu 20.04
Install/Setup Postgres v13.2
apt update -y && apt upgrade -ycurl -s https://www.postgresql.org/media/keys/ACCC4CF8.asc | sudo apt-key add -- Add Postgres GPG key
echo "deb http://apt.postgresql.org/pub/repos/apt $(lsb_release -cs)-pgdg main" > /etc/apt/sources.list.d/pgdg.list- Add Postgres repo
apt-get update -y && apt-get install postgresql-13 postgresql-contrib -y- Install Postgres
sudo -u postgres psql- Switch to Postgres user
create database boundary;- Create Boundary database
create user boundary with encrypted password '<password>';- Create Boundary user with a password
grant all privileges on database boundary to boundary;- Create Boundary user all privileges on Boundary database

- Create Boundary user all privileges on Boundary database
\q- Quit Postgres shell
systemctl restart postgresqlsystemctl enable postgresql
Install/Setup Boundary v0.2.0 on Ubuntu 20.04
Install Boundary
- Create a DNS A record for your Boundary server on your local DNS server
- My DNS A record:
boundary.hackinglab.local
- My DNS A record:
curl -fsSL https://apt.releases.hashicorp.com/gpg | sudo apt-key add -- Add Hashicorp GPG key
sudo apt-add-repository "deb [arch=amd64] https://apt.releases.hashicorp.com $(lsb_release -cs) main"- Add Hashicorp repo
sudo apt-get update && sudo apt-get install boundary -y- Install Boundary
setcap cap_ipc_lock=+ep $(readlink -f $(which boundary))- On Linux, to give the Boundary executable the ability to use the
mlocksyscall without running the process as root
- On Linux, to give the Boundary executable the ability to use the
adduser --system --group boundary- Create Boundary user
mkdir -p /etc/boundary/ssl- Create Boundary config directory
chown -R boundary:boundary /etc/boundary- Change permissions of the Boundary config directory
curl https://raw.githubusercontent.com/CptOfEvilMinions/BlogProjects/master/HashicorpBoundary/conf/ansible/boundary_controller/boundary-controller.service --output /etc/systemd/system/boundary-controller.service- Pull down service config for Boundary controller
sed -i 's/{{ boundary_user }}/boundary/g' /etc/systemd/system/boundary-controller.servicesed -i 's/{{ boundary_group }}/boundary/g' /etc/systemd/system/boundary-controller.service- Set the user and group to run the Boundary controller as
curl https://raw.githubusercontent.com/CptOfEvilMinions/BlogProjects/master/HashicorpBoundary/conf/ansible/boundary_worker/boundary-worker.service --output /etc/systemd/system/boundary-worker.service- Pull down service config for Boundary worker
sed -i 's/{{ boundary_user }}/boundary/g' /etc/systemd/system/boundary-worker.servicesed -i 's/{{ boundary_group }}/boundary/g' /etc/systemd/system/boundary-worker.service- Set the user and group to run the Boundary worker as
systemctl daemon-reload- Load the services into SystemD
Copy Vault certificate and private keys to Boundary server
curl -s -k https://<Vault FQDN>:<Vault port>/v1/pki/ca/pem > /etc/ssl/certs/<domain>-root-ca.crt- Write the Vault root CA to disk
chown root:root /etc/ssl/certs/<domain>-root-ca.crtchmod 644 /etc/ssl/certs/<domain>-root-ca.crt- Set the proper permissions of the root CA
- Copy Boundary intermediate certificate to
/etc/boundary/ssl/boundary_<domain>_pki_int.crt - Copy Boundary controller public certificate to
/etc/boundary/ssl/controller01_boundary_<domain>.crt - Copy Boundary controller private key to
/etc/boundary/ssl/controller01_boundary_<domain>.key - Copy Boundary worker public certificate to
/etc/boundary/ssl/worker01_boundary_<domain>.crt - Copy Boundary worker private key to
/etc/boundary/ssl/worker01_boundary_<domain>.key chown root:boundary /etc/boundary/ssl/*chmod 640 /etc/boundary/ssl/*- Set permissions of the private keys and public certificates
Set common values in configs
The Boundary controller and worker config have alot of similar values. This section is going to set those similar values for the controller and worker config
curl -s https://raw.githubusercontent.com/CptOfEvilMinions/BlogProjects/master/HashicorpBoundary/conf/ansible/boundary_controller/boundary-controller.hcl --output /etc/boundary/boundary-controller.hcl- Pull down Boundary controller config
curl https://raw.githubusercontent.com/CptOfEvilMinions/BlogProjects/master/HashicorpBoundary/conf/ansible/boundary_worker/boundary-worker.hcl --output /etc/boundary/boundary-worker.hcl- Pull down Boundary worker config
sed -i "s#{{ base_domain | replace('.','_') }}#$(tr . - <<< '<domain>')#g" /etc/boundary/boundary-worker.hcl /etc/boundary/boundary-controller.hclsed -i "s#{{ base_domain }}#<domain>#g" /etc/boundary/boundary-worker.hcl /etc/boundary/boundary-controller.hcl- Set base_domain
sed -i "s#{{ vault_addr }}#https://<vault FQDN>:<vault port>#g" /etc/boundary/boundary-worker.hcl /etc/boundary/boundary-controller.hcl- Set Vault URL address
sed -i "s#{{ vault_kms_mount_path }}#<Vault mount path - default transit/>#g" /etc/boundary/boundary-worker.hcl /etc/boundary/boundary-controller.hcl- Set Vault mount path for transit keys – default
transit/
- Set Vault mount path for transit keys – default
sed -i "s#\"{{ vault_addr.rpartition.*#\"vault.hackinglab.local\"#g" /etc/boundary/boundary-worker.hcl /etc/boundary/boundary-controller.hcl- Set the common name in Vault TLS cert
sed -i "s#{{ vault_kms_worker_token }}#<Vault transit worker token>#g" /etc/boundary/boundary-worker.hcl /etc/boundary/boundary-controller.hcl- Set Vault worker token
Configure Boundary controller
sed -i "s#{{ disable_mlock }}#false#g" /etc/boundary/boundary-controller.hcl- Set memory lock flag
sed -i "s#{{ tls_disable }}#false#g" /etc/boundary/boundary-controller.hcl- Set controller TLS mode
sed -i "s#{{ vault_kms_root_token }}#<Vault transit root token>#g" /etc/boundary/boundary-controller.hcl- Set Vault root token
sed -i "s#{{ vault_kms_recovery_token }}#s.LvlNGJqgHje0IEx289SmsLg2#g" /etc/boundary/boundary-controller.hcl- Set Vault recovery token
sed -i "s#postgresql://{{ postgres_username }}:{{ postgres_password }}@127.0.0.1:5432/{{ postgres_dbname }}#postgres://boundary:<password>@127.0.0.1:5432/boundary#g" /etc/boundary/boundary-controller.hcl- Set Postgres URL and password
chown root:boundary /etc/boundary/boundary-controller.hclchmod 640 /etc/boundary/boundary-controller.hcl- Change the permissions of the Boundary controller config
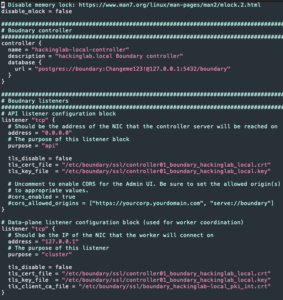
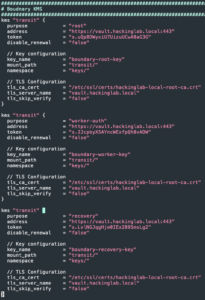
- Change the permissions of the Boundary controller config
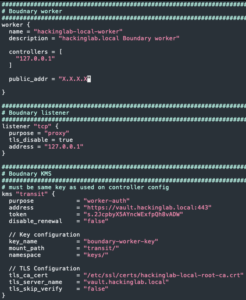
Configure Boundary worker
sed -i "s#{{ ipify_public_ip }}#$( curl -s ifconfig.co )#g" /etc/boundary/boundary-worker.hcl- Set public IP
chown root:boundary /etc/boundary/boundary-worker.hclchmod 640 /etc/boundary/boundary-worker.hcl- Change the permissions of the Boundary worker config
- Change the permissions of the Boundary worker config
Init Boundary
/usr/bin/boundary database init -config /etc/boundary/boundary-controller.hcl > /tmp/boundary-init.txt- Initialize the Boundary database
- Copy the password for the admin user
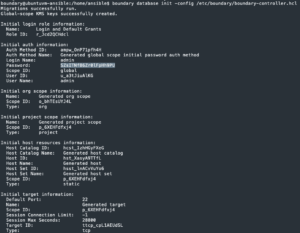
systemctl restart boundary-controllersystemctl enable boundary-controllersystemctl restart boundary-worker
Setup UFW
ufw allow OpenSSHufw allow 9200/tcpufw allow 9202/tcpufw enable
Create/configure Boundary organization via CLI
Login into Boundary via command line on macOS
brew install boundaryexport BOUNDARY_ADDR=https://<IP addr or FQDN of Boundary>:9200boundary authenticate password -auth-method-id=<Password auth method ID> -login-name=admin -password=<admin password>- To get auth method:
cat /tmp/boundary-init.txt | grep -B 4 'Generated global scope initial password auth method' | grep 'Auth Method ID' - ONLY use the
-tls-insecureflag if the TLS certificate is self-signed - If you receive the following warning:
x509: certificate relies on legacy Common Name fieldenter the following command:export GODEBUG=x509ignoreCN=0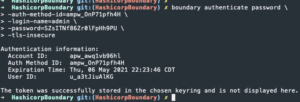
- To get auth method:
Create org/scope
boundary scopes create -name "<org name>" -description "<description>"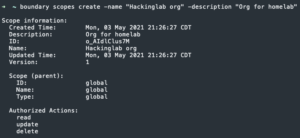
- Copy the org ID which is commonly referred to as the scope ID
Create project
boundary scopes create -scope-id=<org/scope ID> -name="<project name>" -description="<project description>"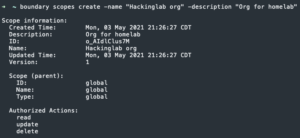 Copy the project ID
Create host catalog and hosts
boundary host-catalogs create static -name <host catalog name> -description "<description about host catalog>" -scope-id <project ID>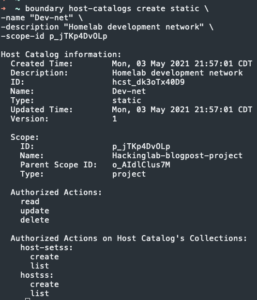
- Copy the host catalog ID
boundary host-sets create static -name <hosts set name> -description "<description about hosts set>" --host-catalog-id=<host catalog ID>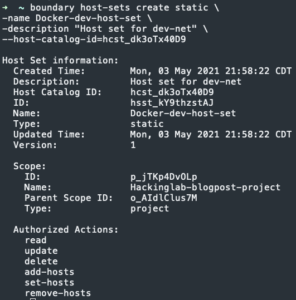
boundary hosts create static -name <machine name> -description "<description about machine>" -address "<IP address of machine>" -host-catalog-id=<host catalog ID>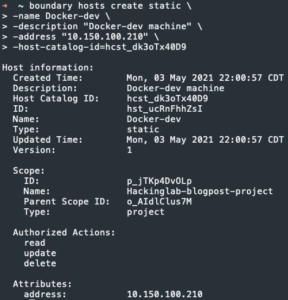
- Copy host ID
boundary host-sets add-hosts -d <Hosts set ID> -host <host ID>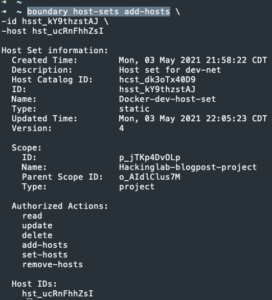
Create Targets
boundary targets create tcp -name <machine name>-ssh-access -default-port=<Port you want to connect too - I will use port 22> -description "<description>" -scope-id <project ID>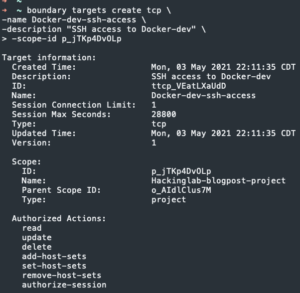
- Copy target ID
boundary targets add-host-sets -id <Target ID> -host-set <Hosts set ID>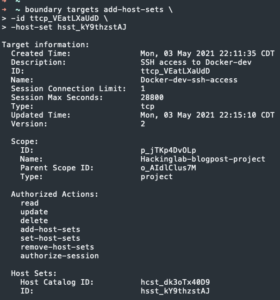
Setup Auth0 as auth method
boundary auth-methods create oidc -issuer "https://<Auth0 app domain>" -client-id <Auth0 client ID> -client-secret <Auth0 client secret> -signing-algorithm RS256 -api-url-prefix "https://<FQDN of Boundary>:<Boundary port>" -scope-id <Project ID> -name auth0- The
issuerURL MUST end with a/ - The
api-url-prefeix MUST NOT end with a/ - If get a 500 error run the following command:
boundary auth-methods update oidc -id <OIDC auth method OD> -issuer "https://<ISSUER_URL>/" -max-age 0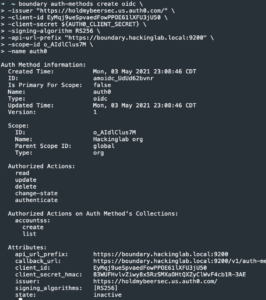
- The
- Copy auth method ID
boundary auth-methods change-state oidc -id <Auth method ID> -state active-public- Activate OIDC auth method
boundary scopes update -primary-auth-method-id <auth method ID> -id <Org ID>- Enable Auth0 OIDC auth method as the primary auth method for the Hackinglab org
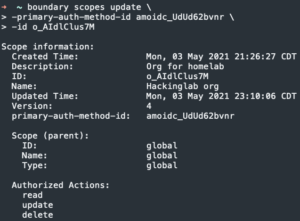
- Enable Auth0 OIDC auth method as the primary auth method for the Hackinglab org
boundary auth-methods read -id <Auth method ID> | grep callback_url- Copy callback_url

- Copy callback_url
- Go back to the Auth0 tab I told you to keep open
- Scroll down to “Allowed Callback URLs” section
- Paste the callback_url

- Select “Save”
Test Auth0 auth method and create user entity
- Open a browser session in incognito mode
- Browse to
https://<FQDN of Boundary>:9200 - Select <newly created org name> from the drop down menu
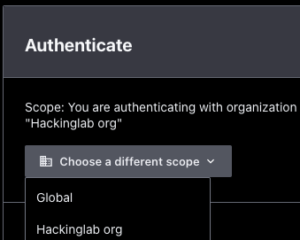
- Select “Authenticate” which will redirect you to a Auth0 login page
- Log into your Auth0 account
- Back to the terminal
boundary users list -scope-id=<Org ID>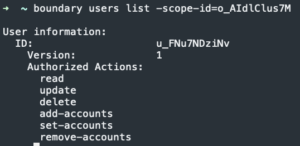
- Copy user ID
Create role to grant access
boundary roles create -name <name>-role -description "<description>" -scope-id=<Org ID>- Create role
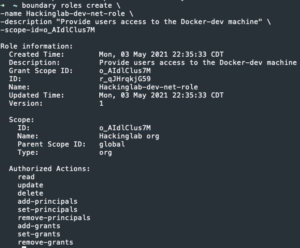
- Create role
- Copy the role ID
boundary roles set-principals -id <role ID> -principal <user ID>- Add principal/user to role
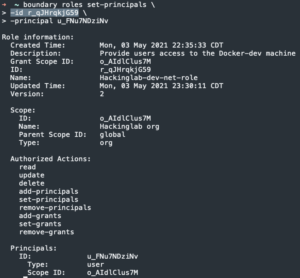
- Add principal/user to role
boundary roles add-grants -id <role ID> -grant "id=<targets ID>;actions=authorize-session" -grant "id=*;type=session;actions=read:self" -grant "type=target;actions=list"- Add grants to role
-grant "id=ttcp_VEatLXaUdD;actions=authorize-session"– Allows users assigned to this role to create sessions-grant "id=*;type=session;actions=read:self"– Allows users assigned to this role to read their own sessions-grant "type=target;actions=list"– Allows users assigned to this role to list the created targets- For more information on Boundary grants go here
https://www.boundaryproject.io/docs/installing/no-gen-resources#create-roles-to-manage-scopes
https://www.boundaryproject.io/docs/installing/no-gen-resources#create-roles-to-manage-scopes
Create/configure Boundary organization via WebGUI
Login Boundary via WebGUI
- Open a web browser to
https://<IP addr of Boundary>:9200- Enter admin for username
- Enter
<Password from the Boundary init command above>for password - To get password:
cat /tmp/boundary-init.txt | grep -A 4 'Generated global scope initial password auth method' | grep Password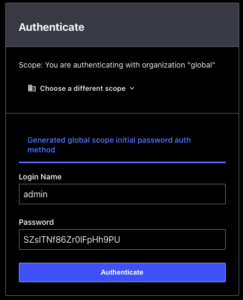
- Select “Authenticate”
Create org
- Open a web browser to
https://<IP addr of Boundary>:9200and login as admin - Select “Orgs” in the top left
- Select “New” in the top right
- Enter
<org name>into Name - Enter a description – optional
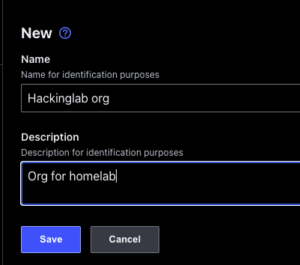
- Select “Save”
- Enter
Create project
- Select “Orgs” in the top left
- Select the org you just created
- Select “Projects” on the left under “orgs”
- Select “+ New”
- Enter a project name
- Enter a description – optional
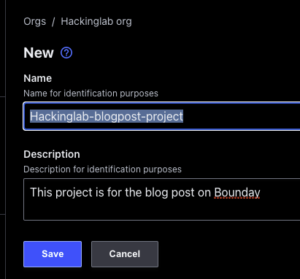
- Select “Save”
Create host catalog
- Select “Host catalogs” on the left
- Select “+ New”
- Enter a project name
- Enter a description – optional
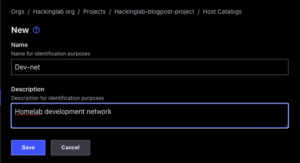
- Select “Save”
- Select “Hosts sets” tab
- Select “+ New”
- Enter a name for the host
- Enter a description – optional
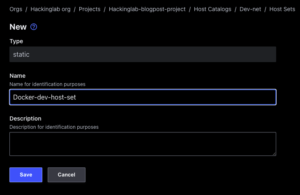
- Select “Save”
- Select Manage > Create and add Host tab
- Enter a name for the host
- Enter a description – optional
- Enter IP address of the host
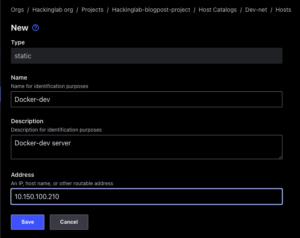
- Select “Save”
Create Targets
- Select “Targets” on the left
- Select “+ New”
- Enter a name for the target
- Enter a description – optional
- Enter the port to connect to server on – SSH is port 22
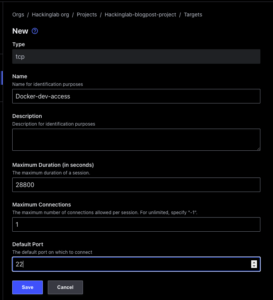
- Select “Save”
- Select “Hosts sets” tab
- Select “Add Host Sets”
- Select the host set you just created

- Select “Add Host Sets”
- Select the host set you just created
Create role to grant access
- Select “Users” on the left
- Find the user that has a name that matches the User ID from above when you logged in on the command line
- This ensures that Boundary successfully acknowledges your OIDC account

- This ensures that Boundary successfully acknowledges your OIDC account
- Select “Roles” on the left
- Select “New” in the top right
- Enter a name for the role
- Enter a description – optional
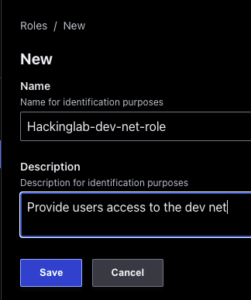
- Select “Save”
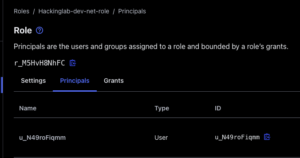
- Select “Principals” tab
- Select “+ Add Principals”
- Check the User ID for your OIDC account
- Select “Add Principals” at the top
- Select “Grants” tab
- Enter
id= <Hosts set ID>;actions=read,updateinto New Grant - Select “Add”
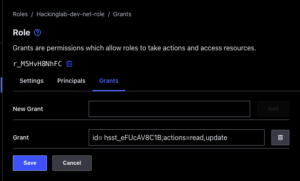
- Select “Save”
- Enter
Connect to remote server using Boundary CLI on macOS
- Open a terminal
brew install hashicorp-boundary-desktopboundary authenticate oidc -auth-method-id <OIDC auth method ID>- Authenticate using Auth0 account
boundary targets list -scope-id <project ID>- List targets
- Copy target ID
boundary connect ssh -target-id <target ID> -username <SSH username>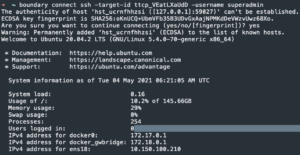
Install/Setup Boundary Desktop on macOS
Install/Setup Boundary
- Open a terminal
brew install hashicorp-boundary-desktop- Open the Boundary app
- Enter
https://<Boundary FQDN>:9200/into Origin URL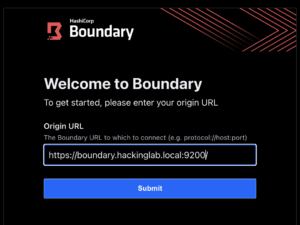
- Select “Submit”
- Select “<Org name” from drop down meu

- Select “Authenticate”
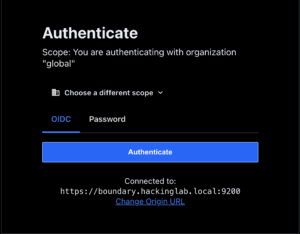
Connect to a Target
- Select “Targets” on the left
- Select “Connect” on “Docker-dev-access”
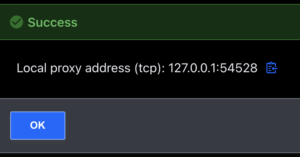
- Copy the localhost and port combo
- Open a terminal tab
ssh <username>@127.0.0.1 -p <Port from prompt above>- Accept new fingerprint
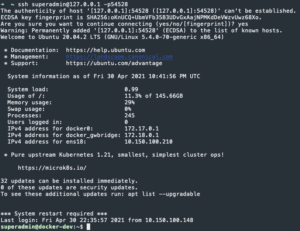

- Accept new fingerprint
DISCLAIMER
This blog post is a proof of concept (POC) for a homelab and does NOT implement best practices for an enterprise environment. Please review the Hashicorp Boundary documentation for best practices. In addition, this POC will be setting up a single Boundary controller and worker instance which does not provide high-availability.
DISCLAIMER
Lessons learned
New skills and technology
- Learned how to setup Boundary v0.2.0
- Learned how to setup OIDC
References
- Creating user, database and adding access on PostgreSQL
- PostgreSQL packages for Debian and Ubuntu
- Secure access using HashiCorp Boundary & inlets PRO Better Together
- Encryption as a Service: Transit Secrets Engine
- Youtube – HashiCorp’s Boundary: Deep Dive and Demo
- Permissions in Boundary
- Installing Boundary Without Generated Resources
- Configure Boundary using Terraform
- Install Boundary Desktop
- OIDC Authentication