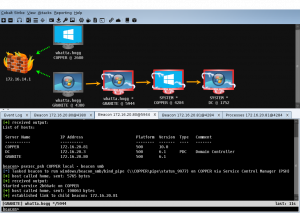
This past weekend, I had the pleasure of red teaming at University of Buffalo’s competition called Lockdown. It was a great competition and I had a lot of fun learning new red team tools and challenging the blue teamers on Windows. This blog post will focus on my C2 infrastructure setup for Cobalt Strike. I did a similar post last semester with PowerShell Empire, which can be found here.
DISCLAIMER
The information contained in this blog post is for educational purposes ONLY! HoldMyBeerSecurity.com/HoldMyBeer.xyz and its authors DO NOT hold any responsibility for any misuse or damage of the information provided in blog posts, discussions, activities, or exercises.
DISCLAIMER
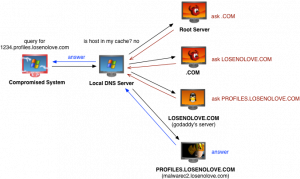
Breakdown of DNS beacons
Create AWS resource
Create EC2 Empire team server
- Select “EC2” from the list of services
- Select “Launch instance”
- Step 1: Choose an Amazon Machine Image (AMI)
- Select “Ubuntu Server 16.04 LTS (HVM), SSD Volume Type”
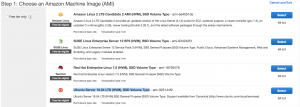
- Select “Ubuntu Server 16.04 LTS (HVM), SSD Volume Type”
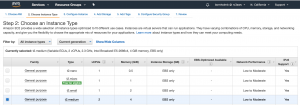
- Step 2: Choose an Instance Type
- Select “t2.medium”
- Select “Configure Instance Details”
- Select “t2.medium”
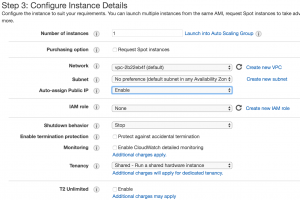
- Step 3: Configure Instance Details
- Select “default” for network
- Select “No preference” for Subnet
- Select “Enable” for “Auto-assign Public IP”
- Select “Next: Add storage”
- Step 4: Add Storage
- Enter “20” for “Size (GiB)”

- Select “Add tags”
- Enter “20” for “Size (GiB)”
- Step 5: Add tags
- Select “Add tag”
- Enter “Name” for key
- Enter “Redteam-teamserver” for value

- Select “Configure Security Group”
- Step 6: Configure Security Group
- Enter “Redteam-teamserver” for security group name
- For the SSH rule enter YOUR public IP for source
- My school has public IP range which I will use
- Select “Add rule”
- Set type to “HTTP”
- Enter “0.0.0.0/0” for source
- Select “Add rule”
- Set type to “DNS”
- Enter “0.0.0.0/0” for source
- Select “Review and Launch”
- Step 7: Review Instance Launch
- Select Launch
- For the Key pair select “existing key pair” or “new key pair”
- Select “Launch instance”
- Select “View instances”
- Wait for new instance to initialize completely
- The “Status checks” column should be “2/2 checks passed”
- Copy the “IPv4 Public IP” for the new instance
Setup/Configure Cloudflare for DNS beacons
Create A record for teamserver
- Browse to https://www.cloudflare.com and login
- Select the domain you wish to use
- Select “DNS” at the top
- Adding DNS A record
- Select “A” from dropdown for type
- Enter “@” for name
- Enter “<Pulic IP addr of EC2>” for name server
- Select “5 min” for TTL
- Deselect the orange cloud to make it grey

- Select “Add record”
Create A record for DNS beacon
- Adding DNS A record
- Select “A” from dropdown for type
- Enter “ns1” for name
- Enter “<Pulic IP addr of EC2>” for name server
- Select “5 min” for TTL
- Deselect the orange cloud to make it grey

- Select “Add Record”
Create NS record for DNS beacon
- Adding DNS NS record
- Select “NS” from dropdown for type
- Enter “dns” for name
- Enter “ns1.<domain>” for name server
- Select “5 min” for TTL

- Select “Add Record”
Final record set

Install/Setup Cobalt Strike on Ubuntu Server 18.04
Disable Systemd-resolv(Ubuntu 18.04 ONLY)
systemctl disable systemd-resolvedsystemctl stop systemd-resolvedrm /etc/resolv.confecho "nameserver 8.8.8.8" > /etc/resolv.confecho "nameserver 8.8.4.4" >> /etc/resolv.conf
Install/Setup Java JDK
ssh ubuntu@<public IP addr of EC2>sudo add-apt-repository ppa:webupd8team/javasudo apt update -ysudo apt install oracle-java8-installer ca-certificates oracle-java8-set-default -y
Start Cobalt Strike teamserver
unzip /opt/cobaltstrike.zip && /opt/cobaltstrike./teamserver <public IP addr of EC2> <password teamserver>
Configure firewall
ufw enable

ufw allow ssh

ufw allow http

ufw allow https

ufw allow 8080/tcp

ufw allow 50050/tcp

ufw allow 53/udp

ufw allow 5353/udp
Setup/Configure Cobalt Strike
Connecting to teamserver with Cobalt Strike
./cobaltstrike- Enter “<public IP addr of EC2>” for Host
- Enter “50050” for Port
- Default port
- Enter “<username>” for User
- Enter “<teamserver password from above ^^^^>” for Password
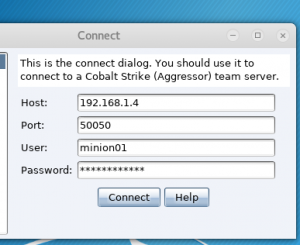
- Select “Connect”
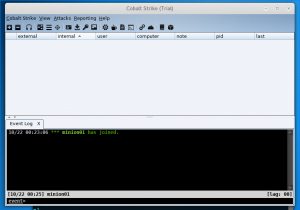
Create a DNS listener
- Select “Cobalt Strike” in the top left then “Listeners”
- A new tab called “Listeners” will be created in the pane below

- A new tab called “Listeners” will be created in the pane below
- Select “Add” under the “Listeners” tab
- Enter “<domain>-listener” for name
- Select “windows/beacon_dns/reverse_http” for Payload
- Enter “<domain>” for Host
- Enter 80 for Port
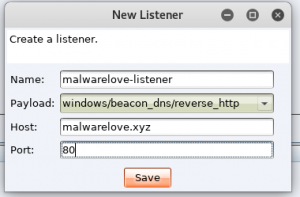
- Select “Save”
- Input
- Enter a list of comma listed FQDNs
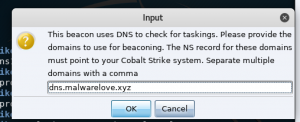
- Select “ok”

- Enter a list of comma listed FQDNs
Generate Powershell web driveby
- Select “Attacks” > “Web Drive-by” > “Scripted Web Delivery”
- Enter “/<custom URI>” for URI path
- Enter “<domain>” for local host
- Leave default port alone
- Select “<domain>-listener” for Listener
- Select “Powershell”
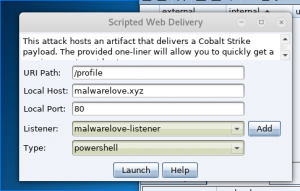
- Select “Launch”

- Copy the text generated by Cobalt Strike
Hammer time
Initial compromise of Windows machine
- Spin up a Windows VM
- Disable Windows Defender
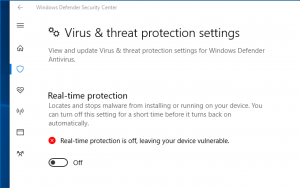
- Open a Powershell prompt as Administrator
- Paste text from above

- Wait for call back in Cobalt Strike
Registering and interacting with agent
![]()
As you can see, the agent initially called back to Cobalt Strike but in the current state you can’t interact with the agent. The agent calls back every 60 secs and it will take a couple of minutes for the agent to be fully downloaded to infect the host. To speed up the process, you may do the following:
- Right-click the <new agent>, go to “Session”, and then select “Sleep”
- Enter “0”
- This will set the beacon interval to as fast as possible

- This will set the beacon interval to as fast as possible
- Wait for the 60 second cycle to finish

- Right-click agent and select “interact”
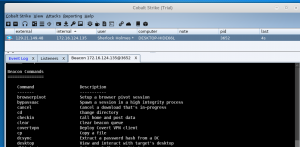
Traffic analysis
Wireshark analysis
If you open Wireshark on the infected Windows host you will notice the DNS beacon. However, if you enter “ps” into the agent console, the beacon will report the process list using HTTP, as seen in the photo below.
- Enter “ps” into the agent console
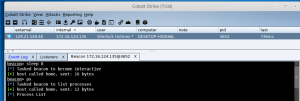
The screenshot below shows the agent requesting new tasks via DNS. However, the agent returns the results of the task via HTTP to Cobalt Strike.

Converting agent from HTTP –> DNS only
- Enter “mode dns” into the agent console

- Enter “ps” into agent console
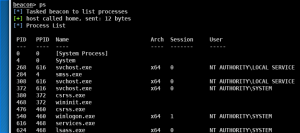
The screenshot below shows the agent requesting new tasks via DNS. The beacon receives the process list and returns the result via DNS to Cobalt Strike.
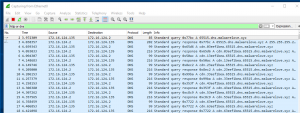
What and why?!?!!?!?!
You may be asking yourself, I thought we selected the “beacon_dns” listener?!?! Well, we actually selected the “beacon_dns/reverse_http” listener. This may be confusing but let me explain. HTTP allows for a quicker initial compromise of the host because the payload section within HTTP is bigger than DNS.
Downloading the Cobalt Strike agent via DNS will take roughly 3,000 requests and can take up to 5 mins for the agent to fully register. The quickest way to initially compromise a host is to use HTTP to initially download the agent. Once the agent is fully registered, we can switch the C2 protocol to DNS. This process is shown in the photo below. More information on this process can be found here.
![]()
Takeaway for Blue teamers
I have been doing Red vs. Blue competitions since my freshmen year (5 years). Being a Blue teamer can be overwhelming, challenging, difficult, stressful, and incredibly complex. Our job as Red teamers is to create an environment that challenges Blue teamers to learn new things, to create unique solutions to problems that arise, and to create stress through various Red team activities. I know that last part may sound terrible, but handling stress is a good avenue to help mature and polish your skills. In the real world, when breaches occur, you need to keep cool, calm, and collected to handle the incident in an appropriate and timely manner. One way to know how you will react to a real-world situation, is to participate in these competitions. Alex Levinson, a National CCDC Red teamer, says it best “You can’t buy experience. It must be earned through sweat, tears, and many sleepless nights.”
During these competitions, you will fail and that is OKAY, but make a list and when you go home, improve upon where you fell short. This is a continuous cycle that I do after EVERY competition. As a Red teamer, I really want you to KICK ME OUT OF YOUR BOX! I will do everything to STOP that from happening, but I genuinely want you to succeed!
Finally, team morale is a HUGE factor that usually dictates if a team will win or not. The teams that have good moral will typically win but not in all cases. The RIT CCDC team that I competed with loved singing Taylor Swift, and when the stress levels were high, we would start singing TSwizzle to reduce the stress. I encourage all teams to do something similar, heck have corny jokes on hand – everyone loves dad jokes. How you and your team handle the stress may be the factor that makes you the winning team or the losing team. As a last and final note, if you walk away learning something YOU ARE A WINNER. Competitions are a place to LEARN and a place to MAKE MISTAKES that won’t impact the lives of others, unlike the real word.
DISCLAIMER
The information contained in this blog post is for educational purposes ONLY! HoldMyBeerSecurity.com/HoldMyBeer.xyz and its authors DO NOT hold any responsibility for any misuse or damage of the information provided in blog posts, discussions, activities, or exercises.